Tuesday, May 3, 2016

Enjoy Cinco de Mayo with the kids!

A huge THANK YOU to my sister, Brenda, for creating these yummy JELLO-O Jiggler margaritas for the kids in the newest blog post.


What could be more fun for the kids (and the adults) than some JELL-O Jiggler Margaritas to help celebrate Cinco de Mayo?

Our inspiration comes from not only the awesome tile molds that look just like bar ice cubes and the new citrus mold offered by DTC but also from the Acrylic Margarita Cups available from Cakes Under the Influence.

First get all of your supplies collected.


Make your JELL-O Jiggler recipe per package instructions plus on packet of Knox Unflavored Gelatin if you want it firm enough to stand the lemon/lime on the edge.  Carefully pour into the tile and citrus molds; refrigerate until set.


Got surface bubbles?  If you stir too fast and get bubbles and are too lazy  to pull out your torch/lighter like I am, grab some plastic wrap and gently lay over the area with bubbles and peel back. The bubbles come right off on the plastic.


While you are waiting on your items to set take  your Acrylic Margarita Cups from Cakes Under the Influence and place a small bead of gel around the rim and then sprinkle with your sugar sprinkles.


Once the JELL-O sets, gently flex the mold to the the JELL-O Jiggler to release from the mold.  Repeat until you have all the tiles and Lemon/Limes  you want.


Now you need to pour your margaritas into the Acrylic Margarita Cups available from Cakes Under the Influence.


DTC Items Used:
Tile Molds
6 cavity
25 cavity
Citrus Mold

Items from Cakes Under the Influence:
Acrylic Margarita Cups


Tuesday, February 16, 2016

Pucker Up!


Supplies:
DECOgel
Microwave Safe Container - or the DECOgel container may be used
Lip Mold


Remove a small portion of the DECOgel from the container and add it to your container. Optionally you may microwave in the DECOgel container.


Place it in the microwave and melt for approximately 12 seconds.  Then pour into the mold.  If you want to get rid of the surface bubbles in the photo on the right a quick swipe or two with a torch/lighter and they will clear right up! 


Allow the mold to sit until the DECOgel has set.  If you need to speed it up a bit place in the fridge.

Gently flex the mold to get the DECOgel lips to release.  Wouldn't these lips look great on  your next cake or cupcakes!  Or perhaps enhance the lips on your next character cake!  


DTC Products Used:

Tuesday, February 2, 2016

Speaking from the Heart

A Thank You goes out to Erin Cronbaugh, owner of The Cake Life, for the latest blog post.  


Tools Needed:
* Colored Fondant
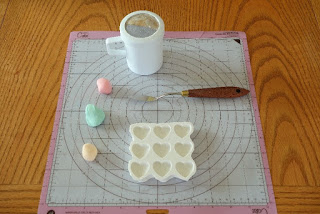
* Conversation Heart Mold
* Palette Knife
* Powdered Sugar
* Thin Paintbrush
* Petal Dusts

Roll a small amount of fondant into a ball, making sure there are no creases.


Roll the smooth shape into a small amount of powdered sugar.

Press into the mold.

If there is excess, use a palette knife to trim.  Start in the middle of the shape and pull down.

Then start in the middle of the shape and pull upwards, keeping knife level with the mold.

Smooth any ragged edges with your finger.

Repeat filling the mold with various colors.

Turn the mold upside down and use the back of the palette knife to gently tap the fondant shapes out.
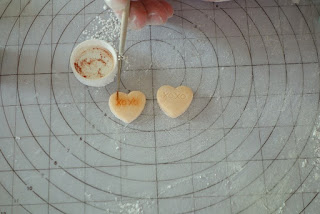
Chose a very small thin brush and either petal dusts or dry food coloring that is a shade or two darker than the fondant.

Use the thin brush to lightly dust over the lettering on the hearts, trying to stay inside the letters.

This will slightly emphasize the letters.

Don't go too dark like I did with this one.

The finished conversation hearts!


DTC Product Used:
Valentine - Conversation Hearts


The Cake Life
Facebook Page